
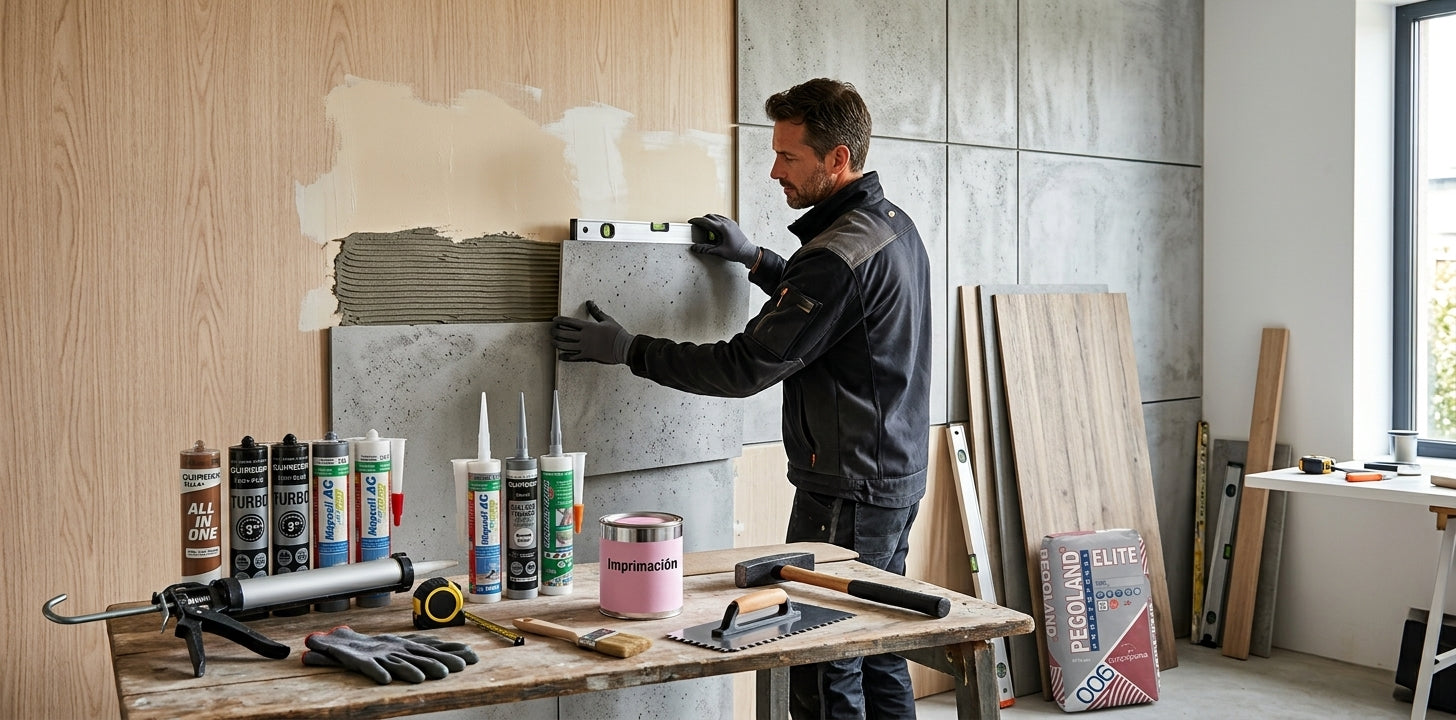
Choosing the right wall covering is only half the job. The wrong adhesive, incompatible silicone, or skipping the primer are the mistakes that ruin an installation that was perfect on paper. This guide explains which installation product you need for each material, substrate, and environment, using technical data rather than generalities.
Why the installation product determines the final result
A quality wall panel installed with the wrong adhesive will come loose within months. A waterproof wall covering sealed with incompatible silicone will allow water to seep through the joints. The reality is that installation products — adhesives, primers, sealants, fillers, and tools — are just as decisive for the final result as the wall covering itself.
Three variables determine which product you should use in each case:
- Type of wall covering: PVC, flexible stone, MDF, porcelain, cement fiber, and acrylic panels are not bonded in the same way or tolerant of the same chemicals.
- Type of substrate or wall: plaster, concrete, existing tile, wood board, or exterior facade. Each surface has different absorption and mechanical strength.
- Usage environment: dry indoor area, wet area, outdoor area with extreme temperature cycles, or in permanent contact with water, such as swimming pools or spas.
Basic rule: When a wall-covering manufacturer specifies a particular adhesive in its technical data sheet, that is the only one that guarantees the stated performance. Replacing it with a similar product may invalidate the product warranty and compromise the installation.
Types of adhesives: which one is right for each situation
The market offers five families of adhesives for wall coverings. They are not interchangeable. Each has a specific application profile.
Cement-based adhesive (tile adhesive)
The standard for ceramic, porcelain, and natural stone over mortar, concrete, or plasterboard. Most common classifications: C1, C2, C2 TE (extended open time). Add S1 or S2 for flexibility in areas subject to expansion.
MS Polymer
Silane-modified polymer. Versatile, solvent-free, and compatible with PVC, wood, foam, metal, and most plastics. Provides final elasticity and resistance to vibrations. Ideal for lightweight wall panels indoors and outdoors.
Contact adhesive
Apply to both surfaces, allow it to evaporate, then join them dry. Strong immediate grip, with no adjustment time. Used on laminates, Formica, and some decorative panels. Water-based versions are less aggressive for interiors.
Polyurethane (PU) adhesive
One-component; cures with moisture in the air. High mechanical strength and some expansion during curing. Suitable for wood, natural stone, and porous materials. Avoid on PVC or plastics without first verifying compatibility.
Epoxy adhesive
Two-component (resin + hardener). Extremely high chemical and mechanical resistance. Used in swimming pools, laboratories, or industrial areas. Limited working time (pot life) and requires a minimum temperature of 10–15 °C to cure properly.
Double-sided adhesive / foam
Mounting tapes and adhesive foam strips for ultralight panels or temporary applications. Not suitable as the primary solution for permanent cladding with weight or in high-temperature areas.
Adhesive–cladding compatibility table
| Cladding | Recommended adhesive | Adhesive to avoid | Notes |
|---|---|---|---|
| PVC panel | MS Polymer (water-based) | Solvents, expanding PU | Solvents can dissolve or deform PVC |
| Flexible stone | MS Polymer / flexible C2 S1 adhesive | Rigid, epoxy adhesive | It needs elasticity to adapt to substrate movement |
| MDF / wood panel | MS Polymer / one-component PU | Cementitious adhesive | The water in the cementitious adhesive can swell the MDF |
| 3D polyurethane panel | MS Polymer (water-based) / water-based contact adhesive | Contact with solvent, expanding PU | Expanding PU can deform the panel due to expansion pressure |
| Porcelain tile / ceramic | C2 TE (or C2 TE S1 in damp areas) | MS Polymer as the sole adhesive | The cementitious adhesive provides the necessary mechanical strength |
| Cement fiber | Cementitious mortar + battens (mixed system) | Adhesive only, without mechanical anchoring, outdoors | On façades, always combine adhesive with mechanical fastening |
| Natural stone | White C2 TE S1 (to prevent stains showing through) | Dark PU / colored resins | Light-colored or porous stone may show the adhesive when backlit |
Primers: when they are mandatory and when they are optional
Primer is the step that is most often skipped and prevents the most problems. Its function is not decorative: it prepares the substrate so that the adhesive bonds correctly, regulates absorption, and improves chemical compatibility between layers.
Bonding primer
Used on smooth or low-absorption surfaces: old tiles, oil-based paint, polished concrete, metal. It creates a chemically roughened layer that allows the adhesive to bond. Without it, the adhesive simply slides over the surface without penetrating.
Consolidating / fixing primer
For highly porous or friable substrates: old plaster, handmade brick, dry mortar, or surfaces with superficial dust. It penetrates deeply, consolidates loose particles, and regulates absorption so that the adhesive does not lose water before setting. Common product: acrylic resins in dispersion diluted with 10–20% water.
Epoxy primer
For particularly challenging substrates: damp concrete, surfaces with grease or oil residue, or when applying a complete waterproofing system. More expensive and with limited working time, but with far superior adhesion to the rest.
When you can skip the primer: On new gypsum board in good condition, on firmly bonded tiles with the surface lightly sanded, and on mortar substrates with balanced absorption. If in doubt, priming is always cheaper than redoing the installation.
Sealants and silicones: the finish that protects the installation
Joints are the weak point of any wall covering. A well-chosen sealant protects against water, building movement, and mould growth. A poorly chosen one will damage the joint within months.
Neutral-cure silicone vs. acid-cure silicone
Acid-cure silicone releases acetic acid during curing - the characteristic vinegar smell. It is more affordable but corrosive: it should not be used on marble, travertine, porous natural stone, non-stainless metals, or next to fresh cement-based adhesives. It is reserved for glass and non-sensitive surfaces.
Neutral-cure silicone cures without releasing acids. Compatible with practically all materials. It is the correct choice for bathrooms, kitchens, shower areas, and any installation in contact with delicate materials.
Mould-resistant silicone
Contains biocides that inhibit mould growth on damp surfaces. Essential for joints in showers, bathtubs, and sinks. It is not a permanent solution in poorly ventilated areas or places with chronic condensation, where the underlying problem is moisture, not the joint.
Acrylic filler or joint sealant
For joints between panels in dry areas. It can be painted over, making it ideal for skirting boards, mouldings, and ceiling transitions indoors where the final finish will be painted. Not suitable for areas in direct contact with water.
Common mistake: Sealing a joint without cleaning it first. Silicone will not adhere to dust, grease, adhesive residue, or old silicone. The joint must be dry, clean, and free of any residue. A poorly prepared joint will come loose within weeks, regardless of the quality of the silicone used.
Quick sealant comparison
| Sealant type | Wet area | Paintable | Delicate materials | Approximate price |
|---|---|---|---|---|
| Standard neutral-cure silicone | ✅ Yes | ❌ No | ✅ Compatible | €4–8/cartridge |
| Fungicidal neutral silicone | ✅ Yes | ❌ No | ✅ Compatible | €5–10/cartridge |
| Acid-cure silicone | ✅ Yes | ❌ No | ⚠️ Avoid on stone and metal | €3–6/cartridge |
| Acrylic filler | ❌ No | ✅ Yes | ✅ Compatible | €3–7/cartridge |
| MS Polymer sealant | ✅ Yes | ⚠️ With specific paint | ✅ High compatibility | €8–15/cartridge |
Substrate preparation: the steps no one wants to do that prevent 80% of problems
Substrate preparation is the invisible work behind a good installation. It is not visible in the final result, but it determines whether that result lasts 5 or 25 years.
Use a contact moisture meter. Acceptable values: ≤ 3% for plaster, ≤ 5% for concrete and mortar. Above these limits, the adhesive does not cure properly, resulting in air pockets and loss of adhesion. On new construction projects, wait at least 28 days after the mortar has been applied.
Remove poorly adhered paint, loose plaster layers, surface dust, and any grease or oil residue. A scraper, 60–80 grit sandpaper, and a vacuum cleaner are sufficient for domestic surfaces. On construction sites, use an angle grinder with a grinding disc.
Unevenness greater than 3 mm per linear metre requires prior levelling. The quickest option indoors is self-levelling compound or levelling paste. Allow it to set completely before applying the adhesive: at least 24 hours for fast-setting compounds.
Identify the type of substrate and apply the appropriate primer according to the criteria in the previous section. Observe the drying time: generally 1–4 hours depending on temperature and ventilation. Do not apply the adhesive before the primer has cured.
Most adhesives and sealants require an application temperature between 5 °C and 35 °C. Below 5 °C, curing stops or occurs incompletely. Above 35 °C, the open time is drastically reduced, and the adhesive may set before the panel is installed.
Tools required according to the type of installation
The right tool not only makes the work easier: it determines adhesive consumption, layer uniformity, and the quality of the final bond. Using unsuitable trowels or guns without the correct adapter is one of the most common mistakes in home installations.
Notched trowels and spatulas
The tooth size directly affects adhesive consumption and layer thickness. For lightweight coverings (PVC, 3D polyurethane), a 4×4 mm trowel is sufficient - between 0.8 and 1.5 kg/m². For large-format porcelain tiles, 10×10 mm or 12×12 mm trowels are used to guarantee the minimum back coverage of 85% required by EN 12004 in wet areas.
Cartridge or sausage gun
Essential for MS Polymer adhesives and cartridge-applied silicones. Gear or ratchet guns are easier to control than simple trigger guns. For larger jobs, sausage-pack systems (foilpack) reduce material waste by up to 15%.
Pressure roller
For lightweight panels such as flexible stone or vinyl sheets. It ensures that the entire back of the panel makes contact with the adhesive, eliminating air pockets that can cause detachment over time. Pass the roller in two perpendicular directions after placing the panel.
Laser level and aluminum straightedge
A cross-line laser level speeds up layout and ensures that the first course or first panel is perfectly horizontal. The 2-meter aluminum straightedge allows you to check flatness during installation and detect irregularities before the adhesive sets.
Material-specific cutters
- PVC and foam panels: utility knife with a new blade and a metal ruler. Do not use a saw, as it will splinter the edge.
- Flexible stone: utility knife or box cutter. No power tools.
- MDF and wood: circular saw with a fine-tooth blade or jigsaw with a fine-tooth blade to prevent splintering.
- Porcelain and ceramic: tile roller cutter for straight cuts; angle grinder with a diamond blade for curved cuts or holes.
- Fiber cement: angle grinder with a diamond blade. Always wear an FFP2 mask because of the silica dust.
Investment that pays for itself: A quality caulking gun (€20–40) and a correctly sized notched trowel (€8–15) reduce adhesive waste by 20 to 30% compared with unsuitable tools. On a medium-sized job, those savings exceed the cost of the tools.
What percentage do installation products represent of the total cost?
A common mistake is to budget only for the covering and forget the installation products. In domestic projects, installation materials (adhesive, primer, sealants, spacers, and basic tools) typically account for between 8 and 18% of the total material cost.
- 8 m² bathroom wall with PVC panels: covering ~€180, installation (MS Polymer adhesive, fungicidal silicone, primer, spacers) ~€30–45
- Living room with a 12 m² feature wall in flexible stone: covering ~€600, installation (flexible C2 S1 adhesive, MS Polymer sealant, roller, primer) ~€55–80
- 15 m² kitchen renovation with tiled walls: ceramic tiles ~€300, installation (C2 TE adhesive, epoxy grout, neutral fungicidal silicone, tile spacers) ~€70–110
Cutting costs on installation products when they represent less than 15% of the total budget makes no technical or financial sense. A higher-quality adhesive or fungicidal silicone may cost €5–10 more and prevent a €200–400 repair within 18 months.
The 6 most common installation mistakes
- Using solvent-based adhesive on PVC or polyurethane foam. Solvents chemically attack these materials. The visible result usually appears weeks later: blisters, deformation, or loss of adhesion along the panel edges.
- Ignoring the adhesive's open time. Each adhesive has a maximum time between its application and panel installation. Exceeding it means the adhesive has already begun to set, and the bond will be poor even if this is not apparent to the touch.
- Applying silicone over a damp or dirty joint. Silicone does not cure properly when there is residual moisture in the joint, nor does it adhere to dust or adhesive residue. The result: a joint that detaches or lets water through.
- Omitting expansion joints on large surfaces. In installations over 4–5 linear meters without a movement joint, temperature changes cause accumulated stress that eventually cracks the grout or lifts the covering at the corners.
- Failing to acclimatize the material before installation. Wood panels, MDF, and some vinyl products absorb or release moisture when moved from storage to the installation site. If they are not acclimatized beforehand, this dimensional movement occurs after installation: allow at least 24–48 hours in the installation environment.
- Mixing incompatible systems. Applying cement-based adhesive over cured epoxy resin primer, or using cement-based grout on tiles installed with epoxy. Each system has its own compatibility chain. Always consult the technical data sheets before combining products from different families or manufacturers.
Quick buying guide: what you need for your project
| Project | Adhesive | Primer | Sealant | Key tools |
|---|---|---|---|---|
| PVC panels in bathrooms | Water-based MS Polymer | Only for porous substrates | Fungicidal neutral silicone | Gun, utility knife, level |
| Flexible stone (interior) | MS Polymer or C2 S1 | Consolidating primer for plaster | MS Polymer sealant | Pressure roller, scissors, 4×4 trowel |
| 3D polyurethane panel in living room | Water-based MS Polymer | Adhesion primer if smooth paint | Paintable acrylic filler | Gun, miter saw, laser level |
| Kitchen or bathroom tiling | C2 TE (wet areas: + S1) | Bonding primer for porous plaster | Fungicidal neutral silicone | 6–10×6–10 mm notched trowel, cutter, tile spacers |
| MDF panels in bedroom | MS Polymer or single-component PU | Generally not required | Paintable acrylic filler | Gun, circular saw, battens, drill |
| Cement fiber on façade | C2 mortar + mechanical anchor | Consolidating primer for friable substrates | Neutral façade sealant | Angle grinder, hammer drill, laser level, scaffolding |
For specific projects not included in the table, or when there are doubts about product compatibility, consult the Decoeuropa installation products section, where each item includes the complete technical data sheet and compatible substrates.
Real installation cases: what was used and why
Bathroom renovation over old tiles without demolition
Rental apartment, 11 m² of existing tiles in good condition. They are lightly sanded to create a rough surface, and an adhesion primer is applied. The marble-finish panels are bonded with water-based MS Polymer applied in 8 mm beads every 15 cm. Joints sealed with white fungicidal neutral silicone. Result: installation without construction work, no debris, reversible, with the manufacturer's 5-year warranty maintained.
Living room feature wall with flexible stone over plasterboard
New plasterboard partition with medium-to-high absorption. A consolidating primer diluted to 15% is applied and left to dry for 2 hours. The flexible stone is bonded with white C2 S1 adhesive applied with a 6×6 mm notched trowel. A pressure roller is used to ensure full contact. Joints between pieces sealed with slate-gray MS Polymer. Final surface: 9 m². No complications.
Exterior façade cladding with cement fiber
1975 exposed brick façade, 180 m². Ventilated system: aluminum battens anchored to the substrate with an M8 metal anchor every 60 cm. 8 mm cement fiber panels fixed with concealed-head screws. 8 mm joints between panels sealed with polyurethane façade sealant, compatible with the estimated thermal expansion of ±3 mm. No adhesive: fastening is exclusively mechanical, as required by regulations for façades more than 6 meters high.
Frequently asked questions about installation products
Which adhesive is used to glue PVC panels to the wall?
Water-based MS Polymer adhesive is the most recommended option: it contains no solvents that could attack PVC, offers good final elasticity, and is easy to clean. Contact adhesive also works, but it does not allow adjustments once the two elements are in contact.
Is it necessary to prime the wall before gluing wall coverings?
It depends on the substrate. On spray-applied plaster, brick, or dry mortar, primer is almost essential: it prevents the adhesive from losing water too quickly. On smooth surfaces painted with water-based paint or on tiles in good condition, it can be omitted if the surface is lightly sanded to create a rough texture.
What is the difference between neutral-cure and acid-cure silicone?
Acid-cure silicone releases acetic acid as it cures (it smells like vinegar) and can corrode metals, marble, and natural stone. Neutral-cure silicone cures without releasing acids and is compatible with almost all materials. For interiors with delicate materials, always use neutral-cure silicone.
How long should I wait before getting a freshly applied silicone joint wet?
Silicone forms a film in 10–30 minutes, but full curing takes 24–72 hours depending on the temperature and joint thickness. In bathrooms, it is recommended to wait at least 24 hours before getting the area wet.
Which adhesive withstands heat best near cookers or fireplaces?
C2 TE S1 or S2 cement-based adhesives withstand up to 80–120 °C continuously. For fireplaces exposed to very intense intermittent heat, special high-temperature mortars are available that withstand up to 1,000 °C. Conventional MS Polymer is not suitable for sustained temperatures above 80 °C.
Can I glue wall coverings directly onto existing paint?
Only if the paint is fully adhered and there are no hollow areas. If it is oil-based paint or enamel, sand it or apply a bonding primer. If there are doubts about the paint's adhesion, the safest option is to remove it or level the substrate before installation.
What tool should I use to cut flexible stone panels?
A utility knife or box cutter with a very sharp blade on a flat surface. No power tools. For curved cuts, scissors offer more control than a utility knife.
How many kg of adhesive do I need per square meter?
With a 6×6 mm notched trowel: 2.5–3.5 kg/m² for cement-based adhesive. With a gun for lightweight panels: 0.3–0.6 kg/m² of MS Polymer, depending on the spacing between beads. Always check the coverage specified in the product technical data sheet.
Share:
How to choose flooring for each room: technical criteria and room-by-room guide
3D polyurethane panels